
USPS Certified Mail Instructions: How to Safely Send to Recipients
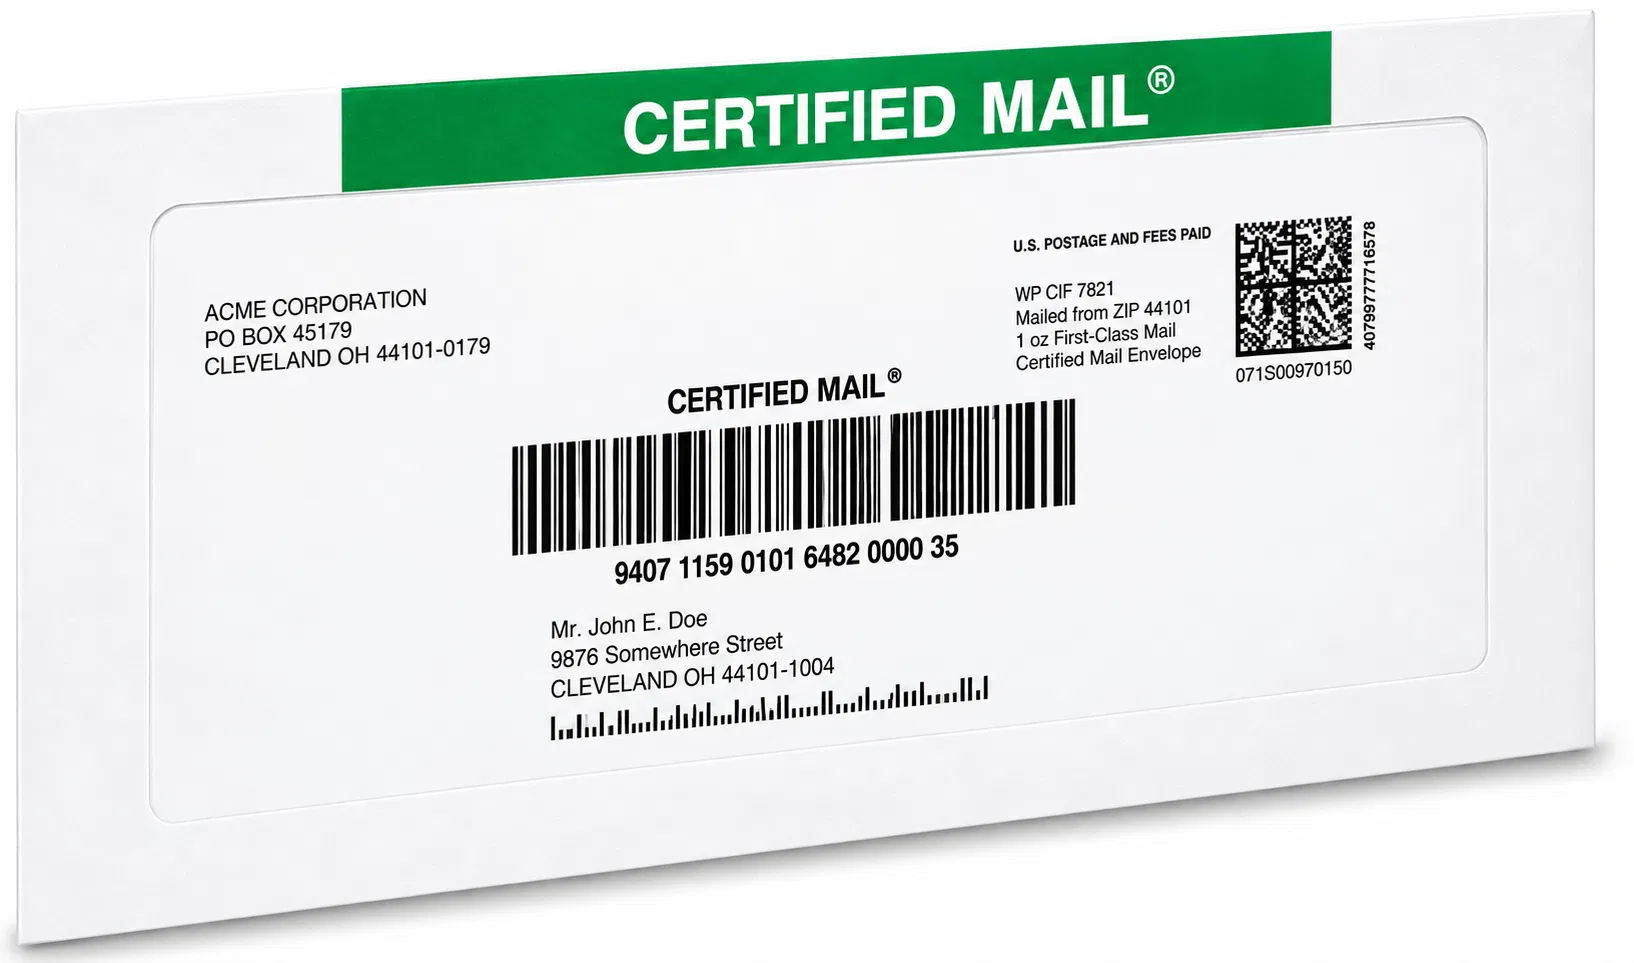 To send Certified Mail, attach the Certified Mail service to your First-Class or Priority postage, keep the mailing receipt with its tracking number, and hand the item to USPS so acceptance is scanned. You can do this at the Post Office counter with PS Form 3800, or online in a few minutes with live-postage Certified Mail labels printed on a standard office printer. Either way, the recipient signs on delivery and you receive proof of mailing and proof of delivery.
This page walks through both methods step by step, explains the add-on services, and shows how tracking and proof of delivery work.
Method 1: Sending Certified Mail at the Post Office
- Address your envelope completely, including any apartment or suite numbers.
- Ask the clerk for PS Form 3800, the Certified Mail receipt, and fill in the required sender and recipient information. Forms are usually available for self-service near the counter.
- Attach the form portion to your mailpiece as instructed; the label carries the tracking barcode.
- Have the receipt date-stamped at the counter. The stamped receipt is your proof of mailing, so keep it safe; it holds your tracking number.
- Pay for postage and the Certified Mail service. Retail counter rates apply.
From acceptance, Certified Mail typically moves through the USPS network at First-Class Mail pace, arriving within a few business days. If you attach Certified Mail to Priority Mail postage, expect faster delivery.
Method 2: Sending Certified Mail Online
The online route skips the counter, the forms, and the retail pricing:
- Create a free account with Certified Mail Labels. Registration takes only your name and contact information; there are no monthly fees and no contract.
- Select your service. Under Address Labels, choose Single Label Creation for one letter or batch creation for a mailing list.
- Enter the recipient's address and choose your add-ons: Return Receipt, Electronic Return Receipt, or Restricted Delivery.
- Print the label on a standard printer. The label is a plain sheet of paper with live USPS postage, a real Certified Mail tracking number, and the barcode USPS scanners read.
- Attach, fold, and mail. Affix the label to your envelope and hand it to USPS or drop it in any collection box.
Because the label uses live USPS postage and skips the counter, you pay less per letter than retail rates. Your account stores the mailing receipt, tracking number, scan history, and delivery confirmation for 10 years at no extra charge, so there is no paper receipt to lose.
Optional: Pre-Approved Certified Mail Envelopes
If you mail Certified often, pre-approved USPS Certified Mail envelopes streamline the workflow. They carry the Certified Mail banner and a cellophane window that displays the tracking label, which lets USPS barcode readers sort the piece automatically for faster processing, and they work with a standard black-ink laser printer for automated mailings. No gluing, taping, or printing labels separately.
Add-On Services Worth Knowing
- Return Receipt (PS Form 3811): the classic green card, signed at delivery and mailed back to you as proof of who received the item.
- Electronic Return Receipt: the digital version. The signature and delivery confirmation are delivered to your inbox, stored in your account, and typically cost less than the paper card.
- Restricted Delivery: only the addressee, or an agent they authorize, may sign for the item. Use it when the document must reach a specific person.
- Priority Mail or First-Class postage: Certified Mail is an add-on; you choose the underlying mail class. Priority gets it there faster.
How Tracking and Proof of Delivery Work
Every Certified Mail item carries a unique tracking number. USPS scans the piece at acceptance and at each facility it passes through, and the record shows every event up to delivery. On delivery, the recipient's signature is recorded with the date and time, and that signature is the proof of delivery. If nobody is available to sign, USPS leaves a notice and holds the item at the local Post Office for pickup, typically for 15 days, before returning it to sender.
With Certified Mail Labels, an Electronic Delivery Confirmation Report is emailed automatically when each letter is delivered, and the full record, proof of mailing, tracking files, and Return Receipt signatures, stays in your account for 10 years, free, searchable any time.
Common Mistakes to Avoid
- Incomplete addresses. A missing apartment number stalls delivery no matter how good the tracking is.
- Losing the counter receipt. It holds your tracking number; photograph it the moment you get it, or skip the counter and create labels online.
- Choosing the wrong add-on. If the document must reach one specific person, add Restricted Delivery; if you need the signature for your records, add a Return Receipt.
- Waiting until the deadline. Certified Mail moves at First-Class pace; plan for the delivery window your matter allows.
Send Certified Mail the Easy Way
Certified Mail does not have to involve lines, forms, or green cards. With Certified Mail Labels, you create and print live-postage Certified Mail labels online in minutes, with proof of mailing, tracking, and delivery confirmation built in and records kept for 10 years at no extra charge. No monthly fees, no contracts, no postage meter to lease. For high volumes, Excel batch labels and API and SFTP automation with USPS SCAN Forms handle bulk workflows, or let our Print & Mail service print, insert, apply postage, and hand your letters to USPS the same business day for orders placed by 5:00 PM Eastern, with a notarized affidavit of mailing.
Ready to get started? Register for a free account or see how the platform works.
FAQ: How to Send Certified Mail
What form do I need to send Certified Mail at the Post Office?
Ask the clerk for PS Form 3800, the Certified Mail receipt. Fill in the sender and recipient information, attach the label portion to your mailpiece, and have the receipt date-stamped at the counter. The stamped receipt is your proof of mailing and holds your tracking number.
Can I send Certified Mail without going to the Post Office?
Yes. Create a free account with an online Certified Mail label provider, enter the recipient's address, and print a label with live USPS postage on a standard printer. Attach it to your envelope and hand the item to USPS or drop it in a collection box.
What is the difference between a Return Receipt and an Electronic Return Receipt?
Both provide the recipient's signature as proof of delivery. The paper Return Receipt is the traditional green card, signed at delivery and mailed back to you. The Electronic Return Receipt delivers the signature and delivery confirmation digitally to your inbox and account, typically at a lower cost.
How long does Certified Mail take to arrive?
Certified Mail travels through the USPS network at the same pace as the underlying mail class, typically First-Class Mail pace of a few business days. Attaching Certified Mail to Priority Mail postage speeds up delivery.
What happens if no one signs for my Certified Mail?
The carrier leaves a delivery notice and USPS holds the item at the recipient's local Post Office, typically for 15 days, for pickup and signature. If it is not claimed, USPS returns it to the sender, and each attempt is recorded in the tracking history.
Can Certified Mail be sent internationally?
No. Certified Mail is a USPS domestic service available only within the United States, and it cannot be sent to military APO addresses. For international destinations, other USPS services or Registered Mail options apply.